
Miscellaneous
Miscellaneous Information
SIDE RAIL KIT
The “Sweet Spot”
The AK Master Mount™ side rail is held to the AK receiver wall by side compression. The underside of the two Allen head screws must compress firmly against the right outside receiver wall in order to have the adequate compression needed to keep the side rail tight against the left receiver wall.
So if you are experiencing slight movement of the side rail after installation, remove the Allen head screw from each hex pin to ensure the end of that pin is not flush with the outside receiver wall. Because the receiver walls actually flex inward during tightening of the Allen head screws, you want the shaft end of the hex head pins inset into the right receiver wall. Remember we are working with an AK, so there can be variations in receiver width, or degree of receiver wall flex.
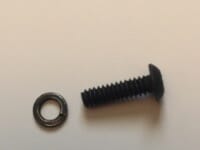
The quickest way to check if pin length is the issue for your side rail’s movement is to add a couple of washers underneath the Allen head screw before installation. Just make sure the center hole in the washer is bigger than the hex pin shaft’s diameter.
This in effect simulates a wider receiver and ensures the underside of the Allen head screw is actually compressing against the outside receiver wall and not just “bottoming out” on the shaft end of the hex pin. Once this diagnosis is confirmed, remove the washers and use a metal file to remove some metal material from the shaft end of the hex pin. Do not worry about removing too much. Note: the washer test is for diagnosis. The washers are not meant for a permanent manner of treatment.
The goal is to find the “sweet spot” of lateral compression with the short allen head screws: Too tight and you can get bolt binding from receiver squeeze. Too loose and you can have side rail movement during shooting. Concentrate on the hammer pin as this is where most receiver wall flex occurs. Milled receivers are more susceptible to inward wall flex. Sometimes the sweet spot range is just too narrow to identify and our two-piece pin may be needed at the hammer site. Contact us if needed to help troubleshoot.
The other cause of side rail movement, which fortunately in not very common, is if the receiver’s left sided axis pin holes are not a true, round 7mm hole (out of spec). Such oversized or misshaped axis pin holes will not adequately support the shoulder of our mounting pins. This problem is not fixable, and unfortunately our side rail kit is not going to work in this scenario.
Century Arms™ VSKA rifle:
Our currently produced AK Side Rail Kits are now VSKA compatible. They have the needed recesses made on the back of the side rail for rivet head clearance.
Our previously produced AK side rail kit will work after some modifications to the back side of our side rail because of the rivets Century Arms installed where a traditional side rail would have been installed on the receiver. For example a small part of the first rivet head (in front of the hammer axis pin) hits the leading back edge of our side rail. You will need to remove a small amount of metal from the back of our side rail (like with a dremmel) so it will lay flat against the side of your receiver.
Also part of the second rivet head hits a small part of the mid section of our side rail so a little amount of material would also have to be removed here for adequate clearance. I have attached a picture showing these areas of contact.
Then pair our side rail kit with our AKM version (rear biased or full length) optic mount.


OPTIC MOUNT FITMENT

Troubleshooting Fitting Issues:
Possibility 1
Unfortunately many AK builders get a little sloppy in their manufacturing tolerances. If optic mount handle closing resistance is felt, or there is still slight optic mount left to right wiggle despite a hard to close handle, there may be interference on the rounded back portion of our handle. Background: Our optic mount is the only one on the market where the back of the handle physically rotates into the side rail’s central cut-out in order to “lock” our optic mount into the side rail. Possible points of interference: (1) the side rail’s central rivet head not flush with the floor of the side rail’s central cut-out. (2) the side rail’s central cut-out slightly off center (see possibility #2 description below). Both of these scenarios will interfere with the back of our handle properly rotating into the side rail’s central cut-out. Clues: look for finish wear on the lower, rounded back protrusion of our handle. See attached picture for an example of this. Treatment: use a dremmel / metal file to remove a small amount of material on the back of our handle exactly where the finish wear is seen OR from the top of the central rivet head if this is too tall. This will provide the needed clearance for the back of our handle to fully close properly.

Possibility 2
If the side rail’s central cut-out is slightly off center, the rounded back of our handle can hit the vertical edge of the side rail’s central cut-out and cause handle closing difficulty and / or push our optic mount up and away from the side rail. Another symptom of abnormal contact at this location is the handle keeps kicking open during shooting. Clues: look for finish wear on the lower rounded back protrusion of our handle, or finish wear on the side rail’s front surface. See the attached picture for an example of this. Treatment: use a dremmel / metal file to remove a small amount of material on the back of our handle exactly where the finish wear is seen. This will provide the needed clearance for the back of our handle to fully close properly. You actually want a small gap between the rounded back of our handle and the central cut-out surface of the side rail to allow for no contact between these two surfaces when the recoil fluid wave comes back through this area during shooting.

Possibility 3
The side rail’s rear rivet head protrudes above the base plate of the side rail and hits the back end of our optic mount when sliding onto the side rail. This scenario results in resistance being felt when the optic mount is slid 1/3 of the way onto the side rail. The end user misinterprets the resistance to the clamp bar being raised too high. Clues: look for finish wear on the top of the rear rivet head OR a small “ding” at the end of the dovetail cut-out channel on the back of our optic mount. See attached picture for an example of this. Treatment: use a dremmel / metal file to remove a small amount of material from the rear rivet head OR to make a shallow scalloped shaped recess at the end of our optic mount’s dovetail cut-out channel. Just make sure to leave enough metal present to make contact with the end of the side rail when the optic mount is installed.
OPTIC MOUNT CENTERING

“Yes, the top picatinny rail of our optic mounts “center” over the center of the receiver”
Because many AK builders get a little sloppy in their manufacturing, you cannot use external landmarks such as the rear iron sight or the dustcover as a point of reference for “center of bore.” This is especially true for the rear sight as they are often canted off midline.
Take off your dustcover, install the optic mount, and place a tape measure across the open receiver to determine actual midline.
An even better test as you really want your optic aligned with the actual path of the bullet is to place a straight object (such as a pencil, dowel rod, or a large drill bit) into the internal barrel opening so that you have a visual point of reference for “center of bore.”
Century Arms™ VZ2008
Century Arms™ VZ2008 rifle:
One of the differences between the Century Arms’s™ VZ2008 receiver and a traditional CSA made receiver, is the lack of a recess along the lower receiver edge at the trigger axis pin site. See attached pictures for further clarification. The first picture is a CSA made receiver, and the red circled area shows the notch at the trigger axis pin site. The second picture shows a VZ2008 receiver with no notch present.
The VZ2008 receiver will have to be modified by adding a notch or recess at this trigger pin site so our proprietary mounting pin head will sit flat against the main height of the receiver wall. This recess can be a full notch like on the CSA receiver, or just a counterbore at the trigger axis pin site. This modification can be made with a drill press, Dremel™ tool, or even a hand drill with a steady hand. The third picture shows such a counterbore modification prior to touching up with black paint.
Then pair our VZ58 side rail kit with our VZ58 version optic mount.


ENHANCED SAFETY LEVER
Using the Enhanced Safety Lever on a Milled Receiver:
Because our AKM version enhanced safety lever is made for a stamped metal receiver, its “gap” is sized accordingly for the thinner wall thickness of the stamped receiver. Our AKM version Enhanced Safety Lever can be modified to fit the thicker metal receiver wall of a milled receiver by using a dremmel or metal file to enlarge this “gap.” Remove metal from the vertical face of the milled paddle part as show with the red arrows in the accompanying picture. Do frequent test fits so as not to enlarge this gap too much. Touch up with black paint when done.

ENHANCED SAFETY LEVER MODIFICATIONS FOR THE DRACO
Our AKM version safety lever will fit the Draco receiver, but its dustcover has a more rounded angle around the charging handle rather than the traditional sharper angle. Thus, the corresponding edge of our safety lever will likely have to be rounded off so it will smoothly slide under that dustcover edge. It’s not hard to do with a dremmel tool and then touch it up with black paint.
See attached pictures showing this process.


SIDE RAIL TYPES

PSL style side rail
